WebKitX is ideal replacement for legacy Web Controls and can be used in Automation or IoT applications as well as Human Machine Interface (HMI) applications. The control is industrial-grade and its out-of-process architecture ensures that your application will not be burdened by HTML rendering and I/O. Everything related to HTML is taking place in separate sub-processes. WebKitX has great memory management vs. IE web controls that have known memory leak problems. Finally, WebKitX offers GPU hardware accelerated graphics for offering to your clients really futuristic HMI and HUD interfaces with WebGL controls, animations and audio.
WebKitX implements URL loading by property assignment via the HMI_URL method and offers 255 I/O HMI_VALUE channels that can be used in the following ways:
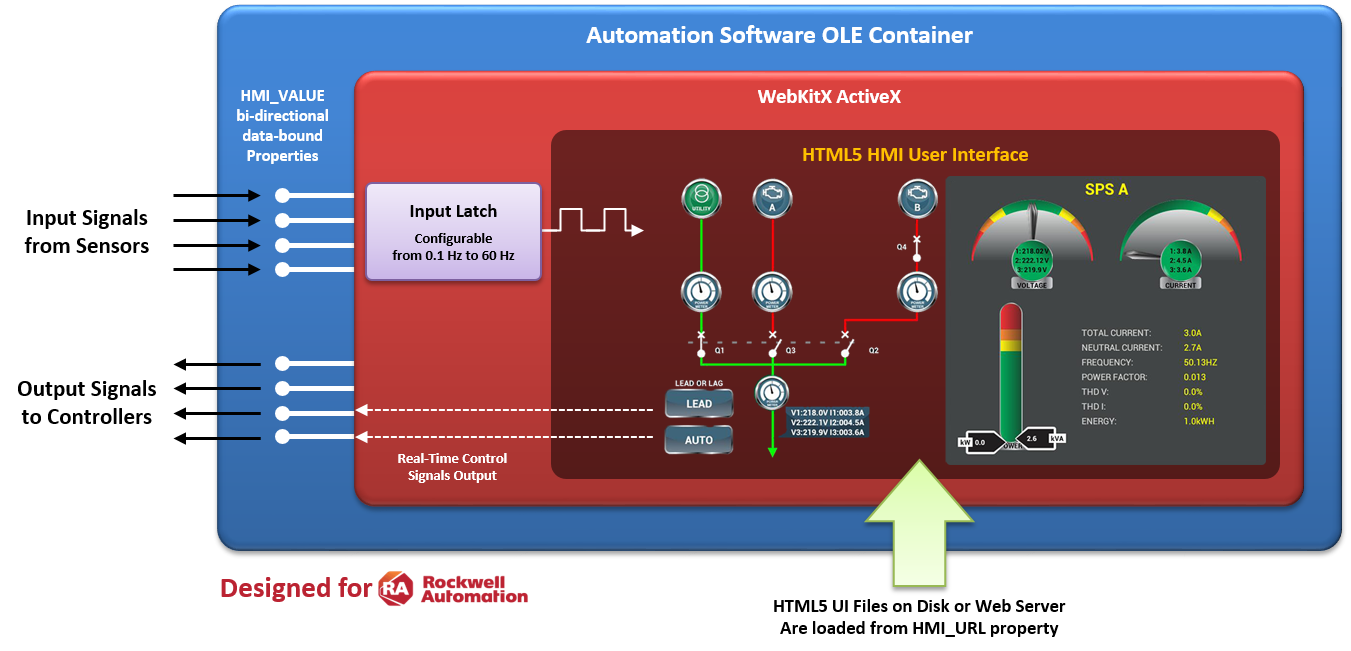
For more information please read about HMI_VALUE and HMI_URL.
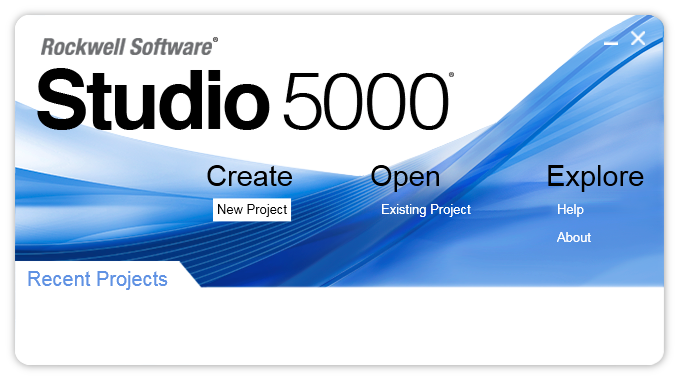
Start Rockwell Studio and create a new Factory Talk project.
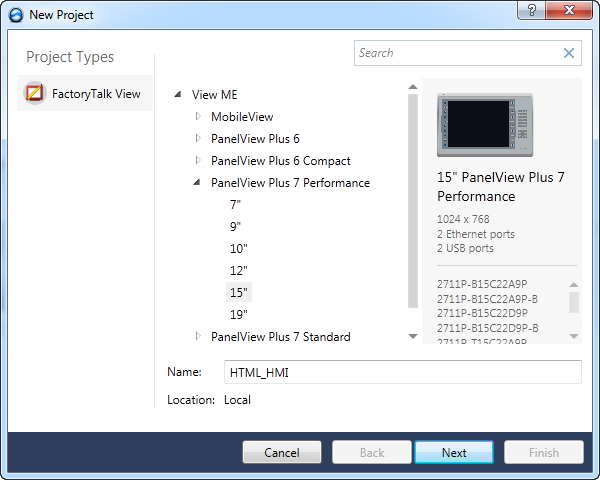
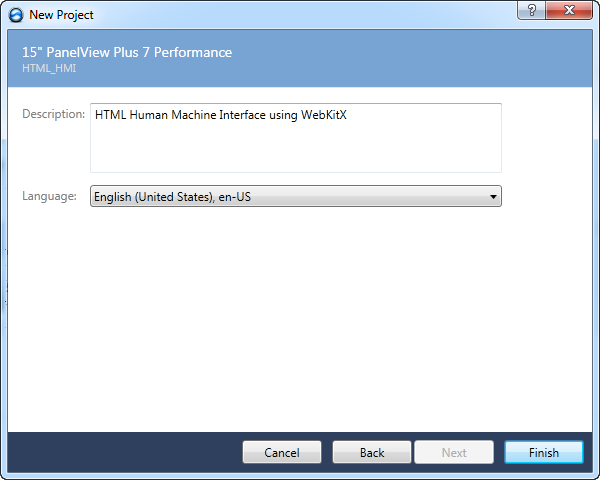
In this example we call our project HTML_HMI but you can use any name. Click Next.
Provide a project description and click Finish.
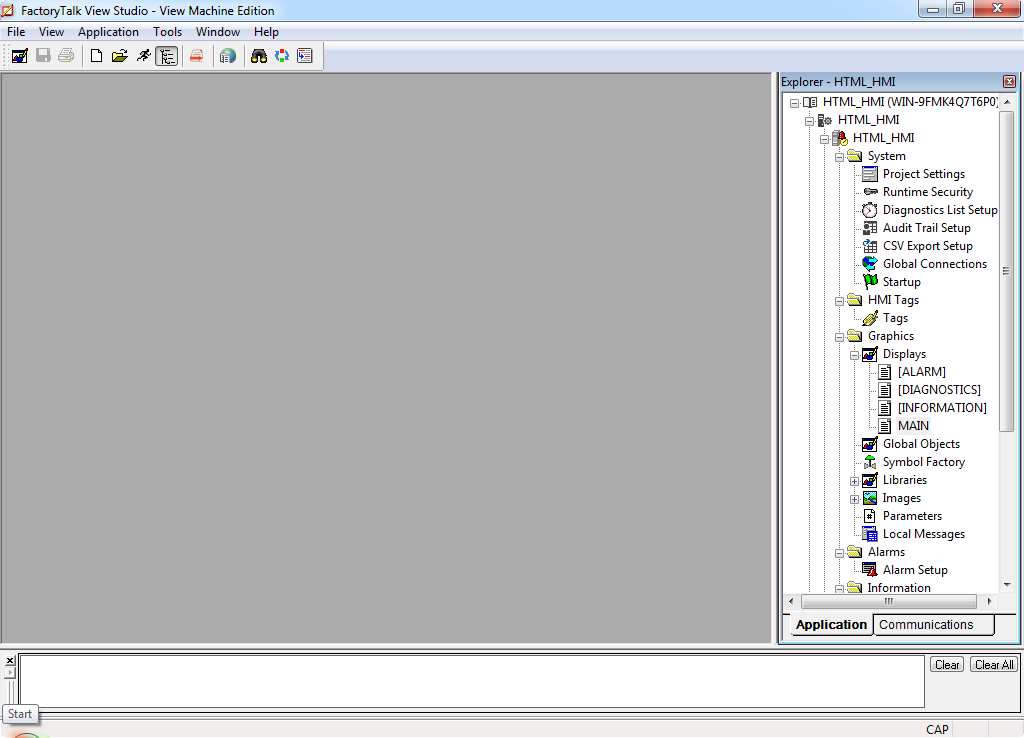
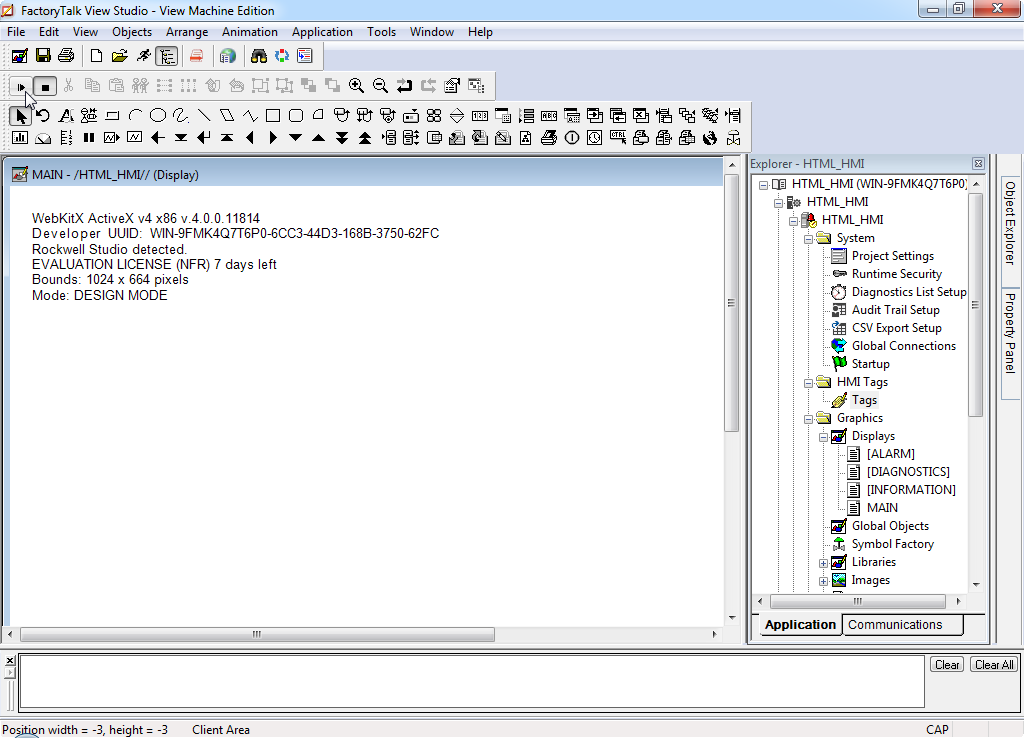
In FactoryTalk View Studio IDE the new project has certain default Displays. Open the MAIN display.
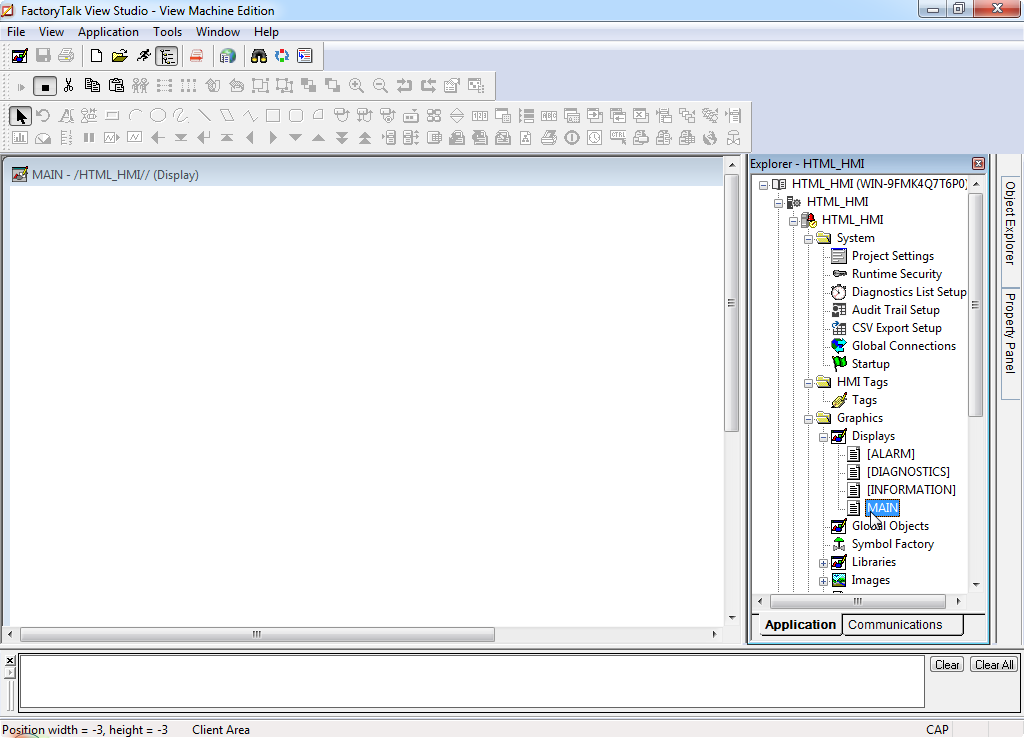
Double-click on MAIN display to open it.
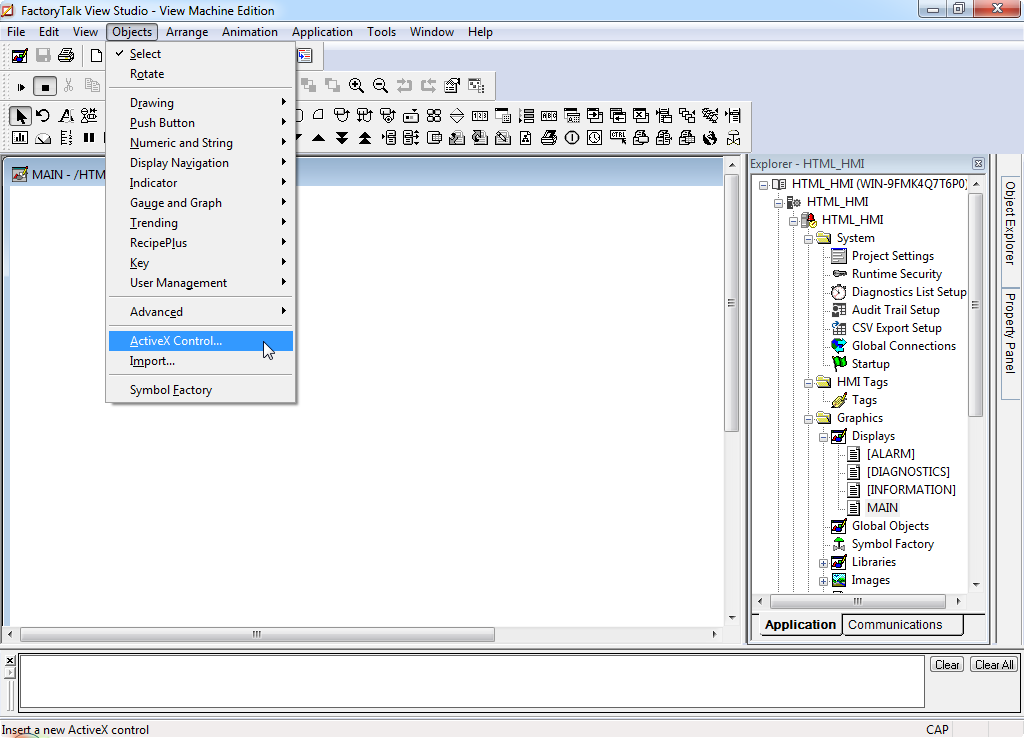
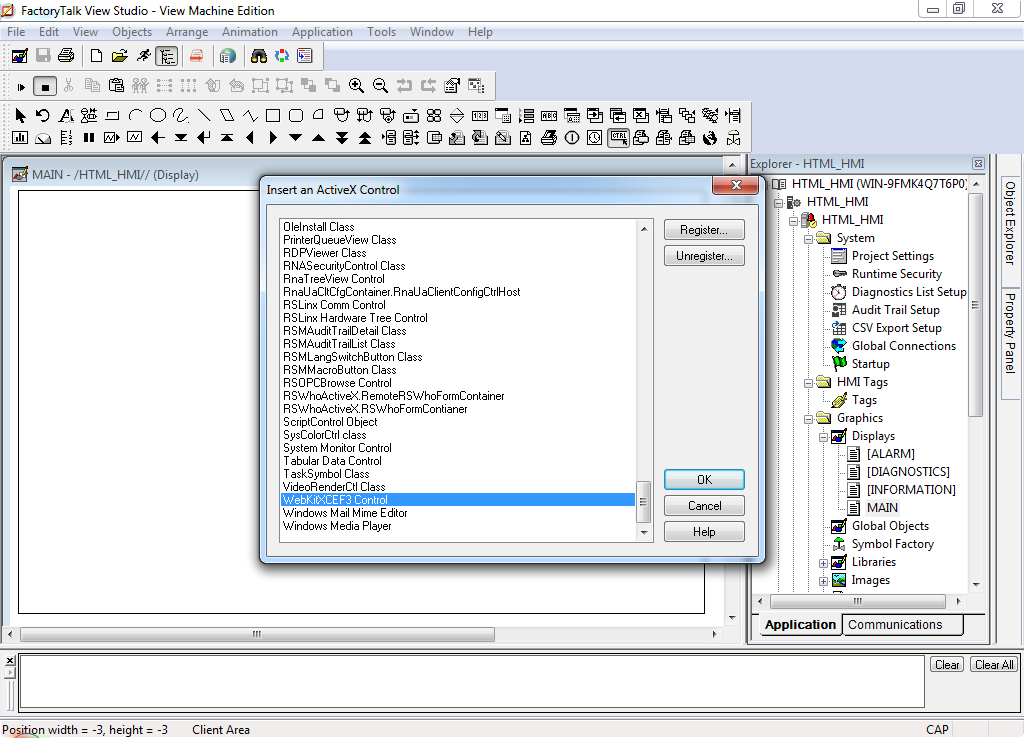
To insert WebKitX you must click on the Objects > ActiveX Control... menu.
Select WebKitXCEF3 Control form the list and click OK.
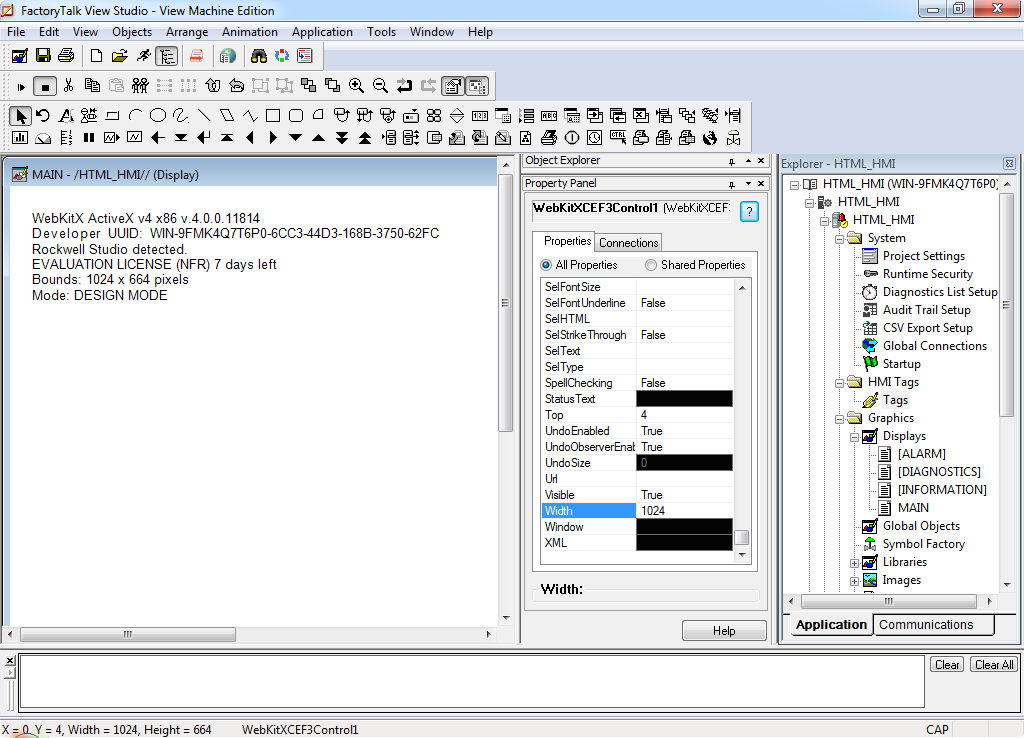
Drag the control in a rectangular area on the Display. You will notice that "Rockwell Studio detected" notification on the canvas of WebKitX. This means the control is now operating in industrial-mode which has certain optimizations related to the Rockwell environment, including the HMI_URL and HMI_VALUE circuitry activation. Use the Property Panel to set control size and position. The size is also displayed on control's canvas.
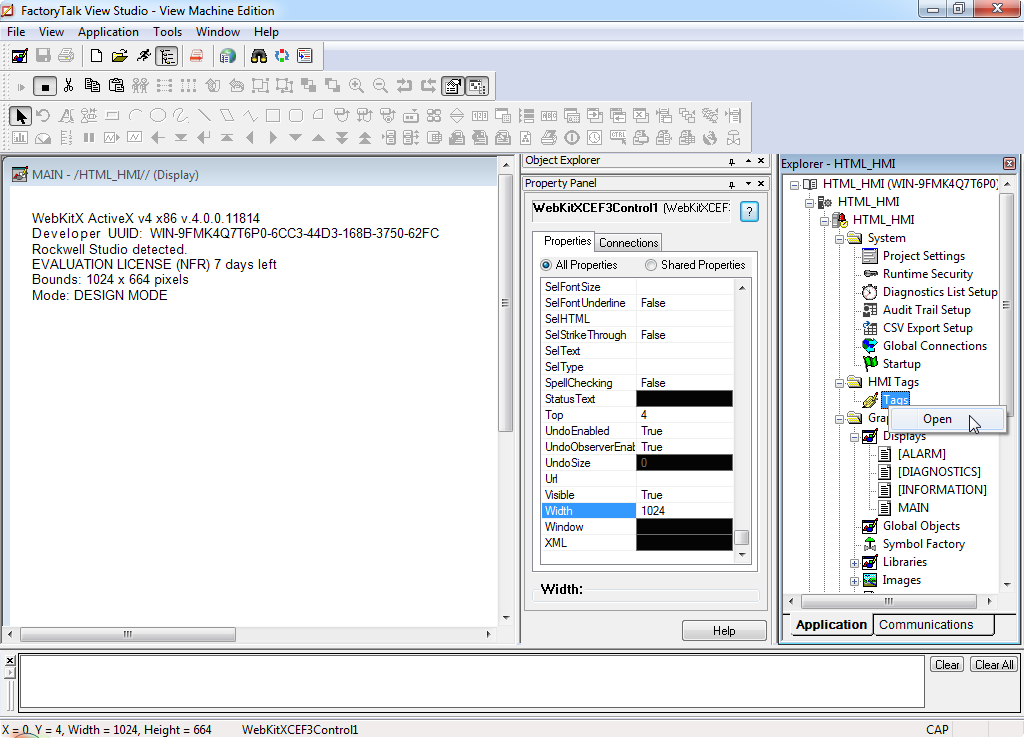
For this demo we will need to add an HMI Tag. In Explorer locate Tags and right-click to select Open.
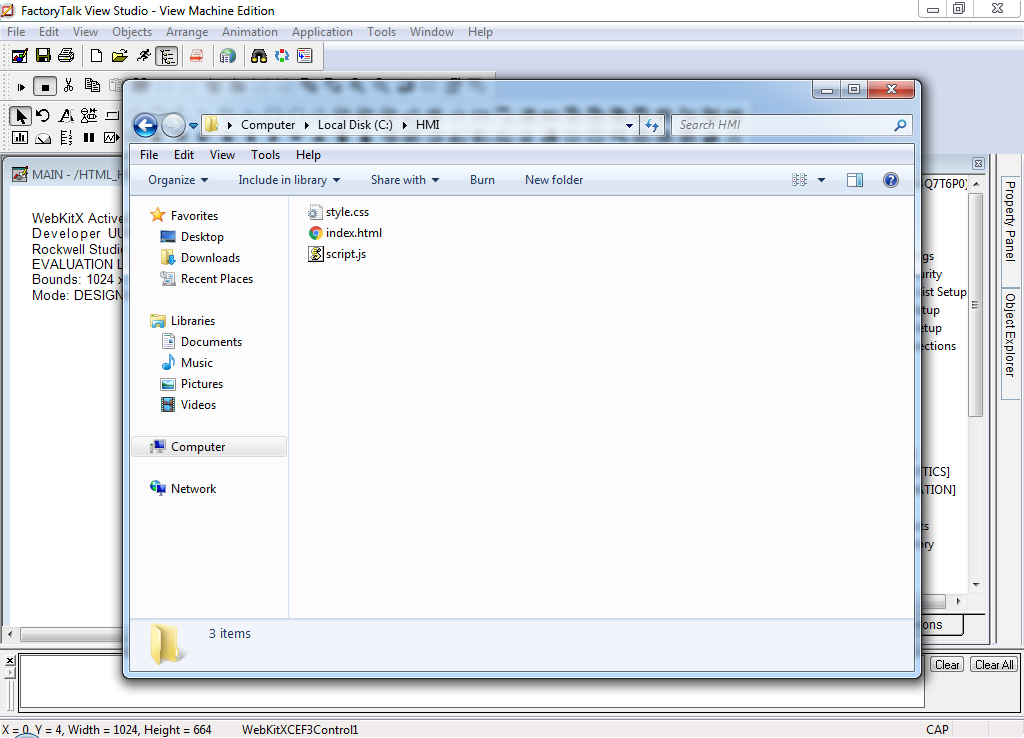
Add a Name (eg. HMI_URL). Make sure the Data Source Type is Memory and check Retentive. Put a URL in Initial Value. For this example we use custom HTML bundle that we will place in C:\HMI folder. When ready click on Accept.
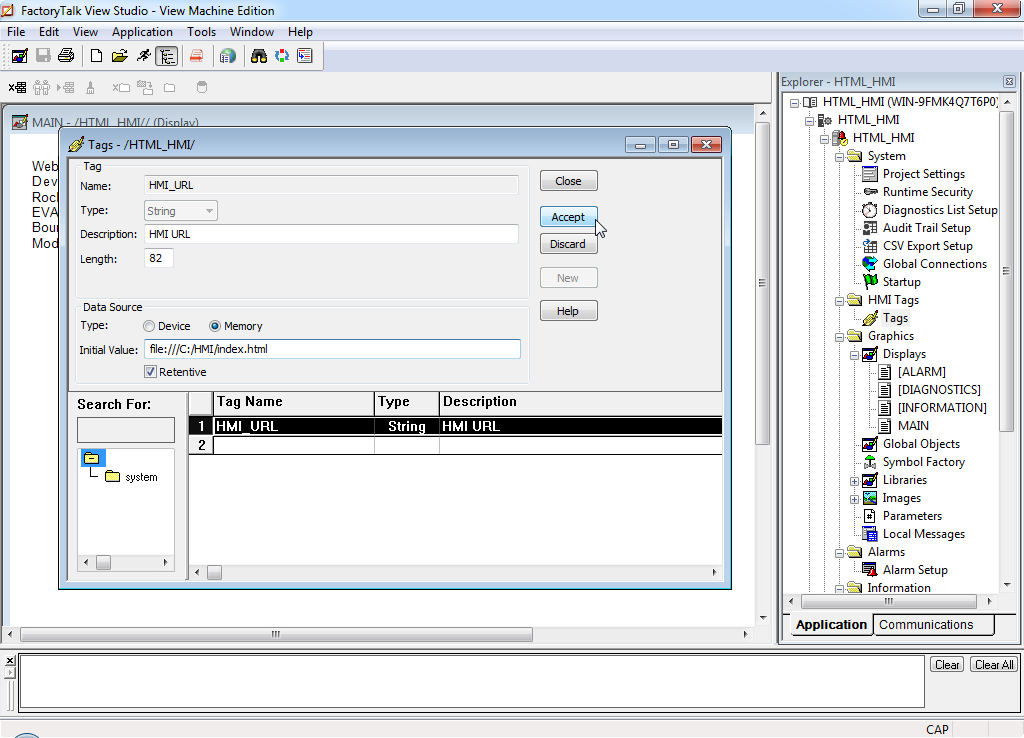
Please the demo files in C:\HMI. Demo files are by default inside the C:\Program Files (x86)\WebKitX CEF3 ActiveX\Samples\VB6\Simple Browser - HMI - Real Time IO Values folder. Copy them to C:\HMI.
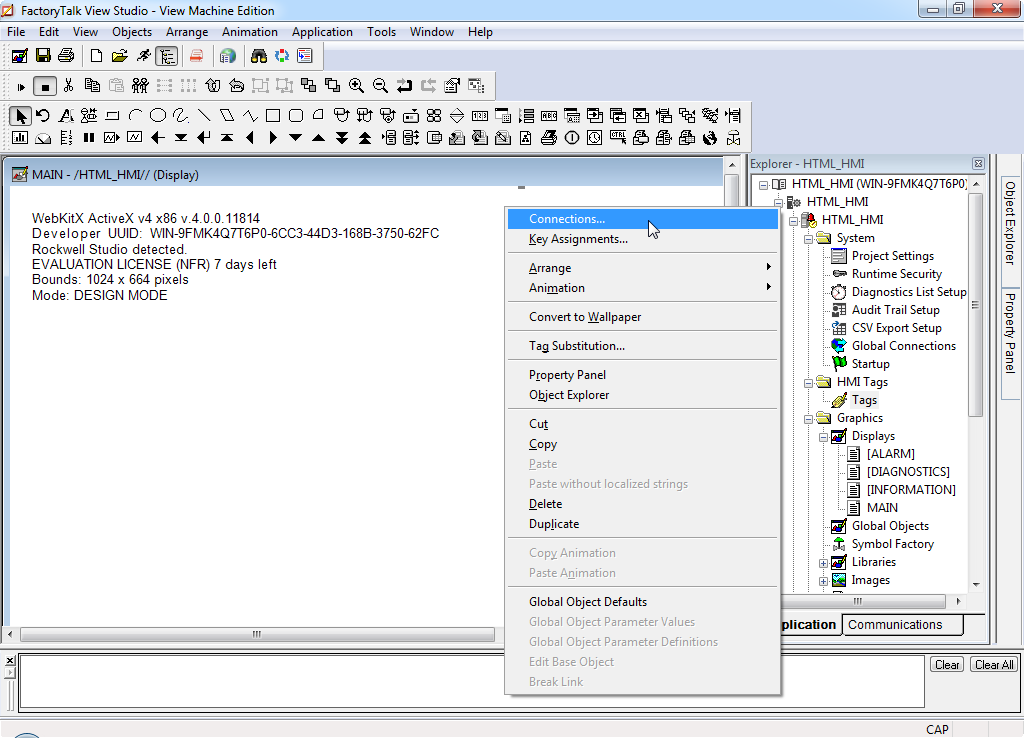
Next we need to setup HMI Connections. Right-click on WebKitX and click Connections...
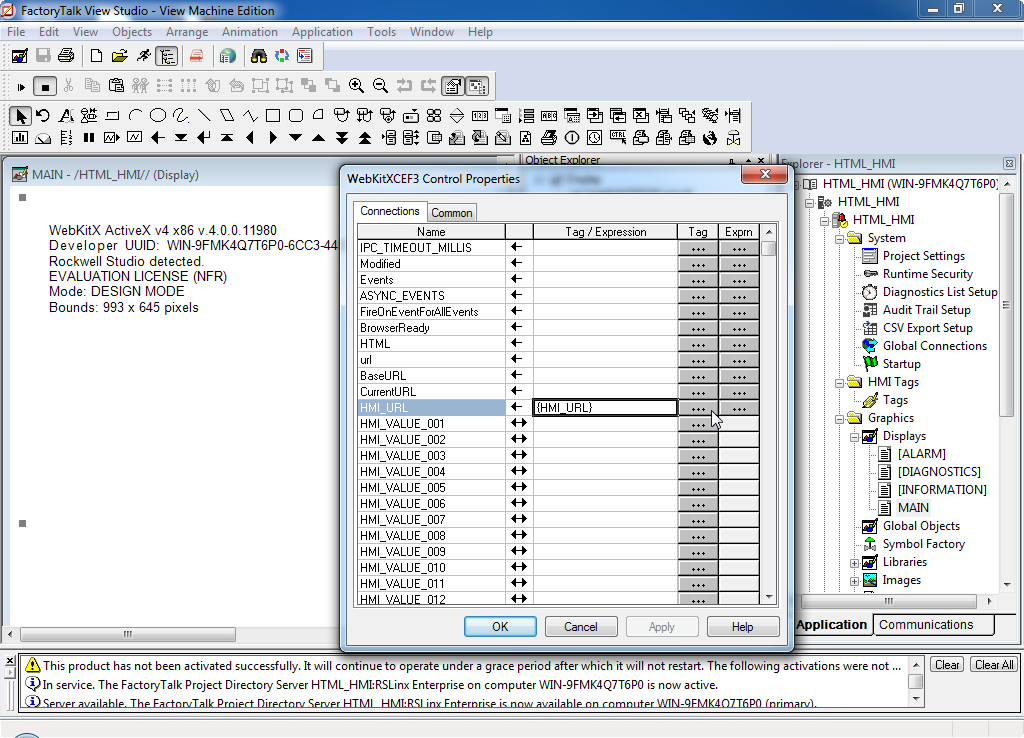
In WebKitXCEF3 Control Properties window, in the Connections Tab, you will see the HMI_URL property and 255 HMI_VALUE properties named HMI_VALUE_001 to HMI_VALUE255. Select HMI_URL and click the Tag button as shown in screenshot.

In Tag Browser window, select the HMI_URL tag we added in previous step. If you used a different name you will need to select it. Click OK. (We used same name with property for simplicity, you can use any name).
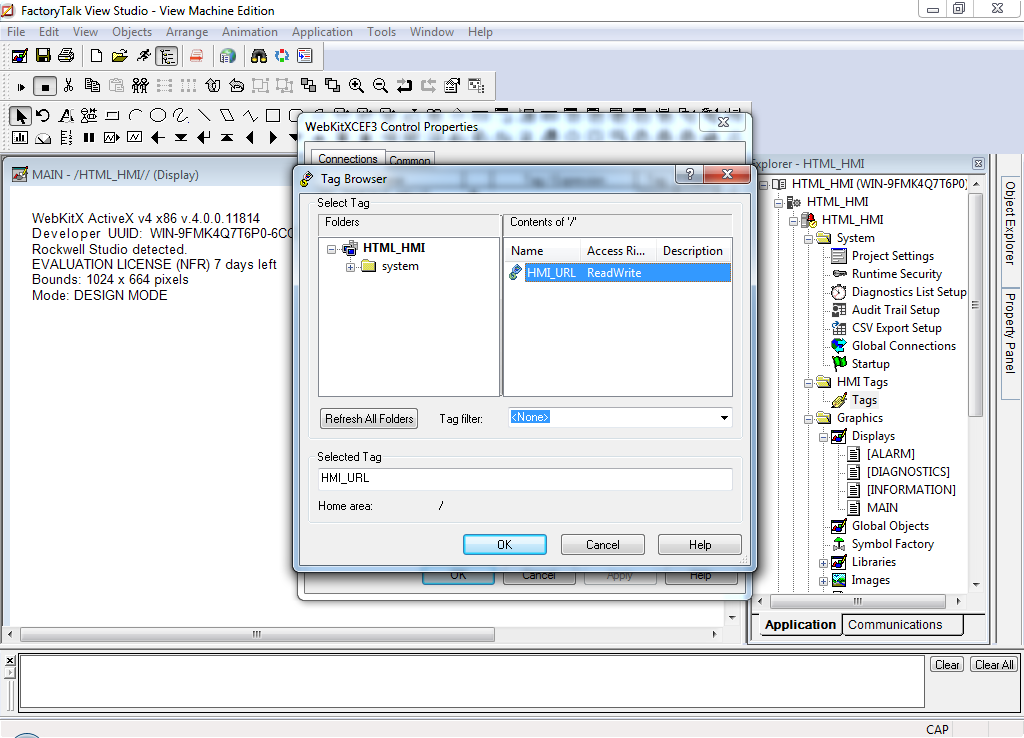
Finally, the {HMI_URL} tag is bound to HMI_URL property of WebKitX. Click OK.
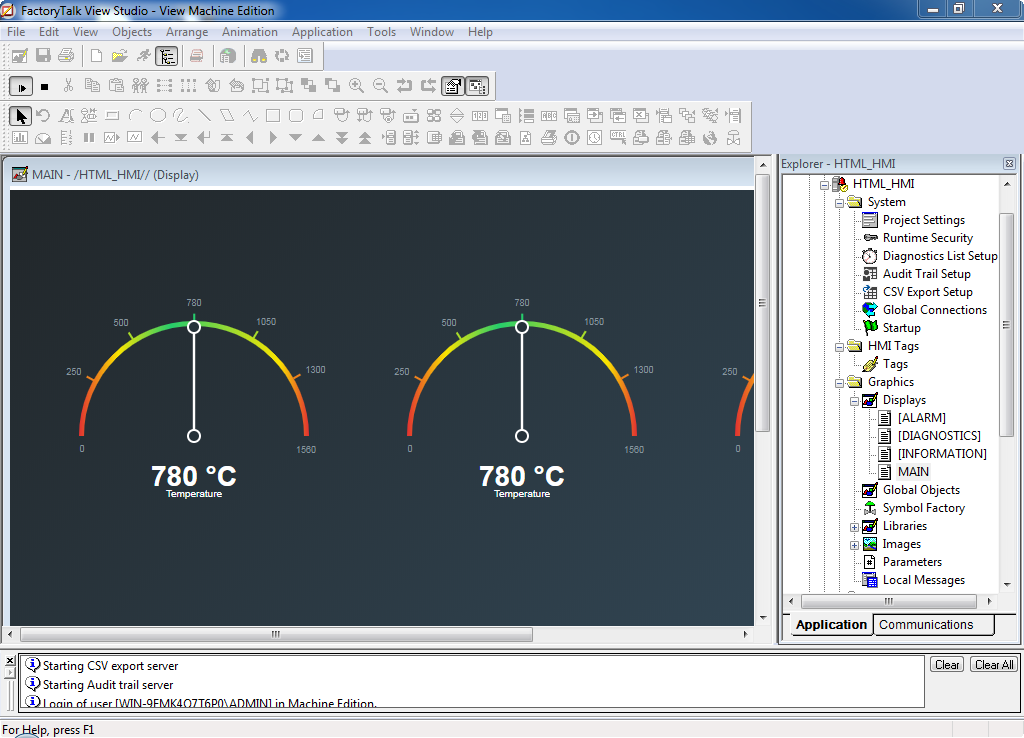
We are ready to test. Click the Test Display button.
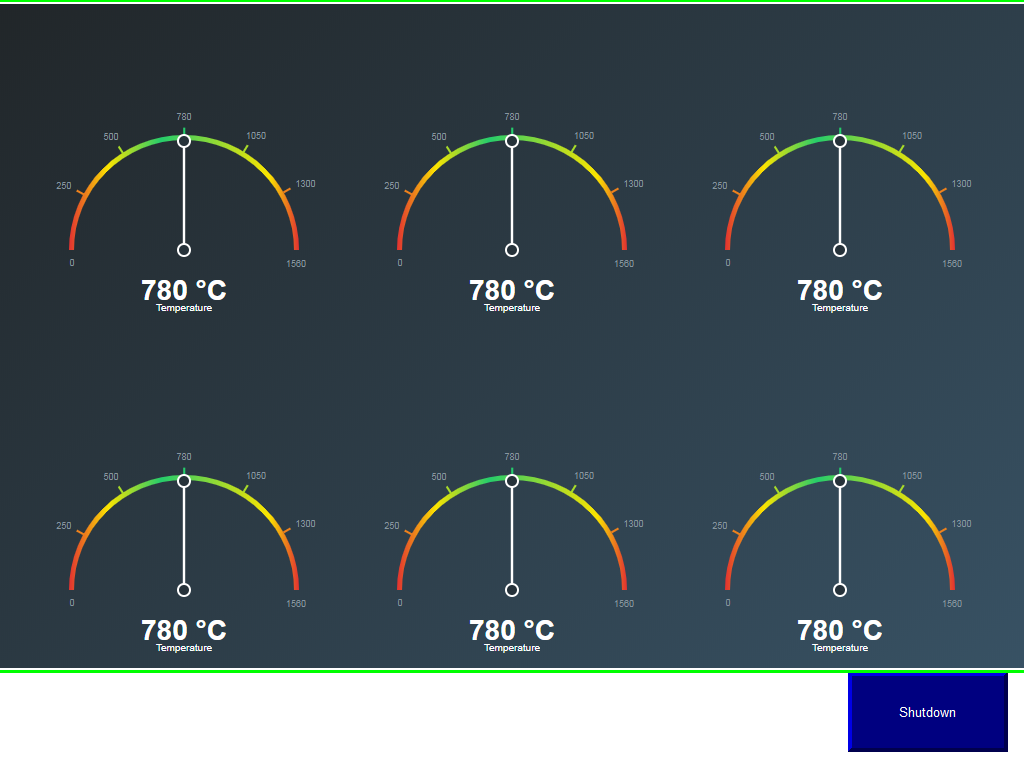
WebKitX will now enter Runtime Mode and load the HMI_URL provided. The demo HTML bundle demonstrates how to use HMI_VALUE channels to read sensor data into 6 gauge controls.
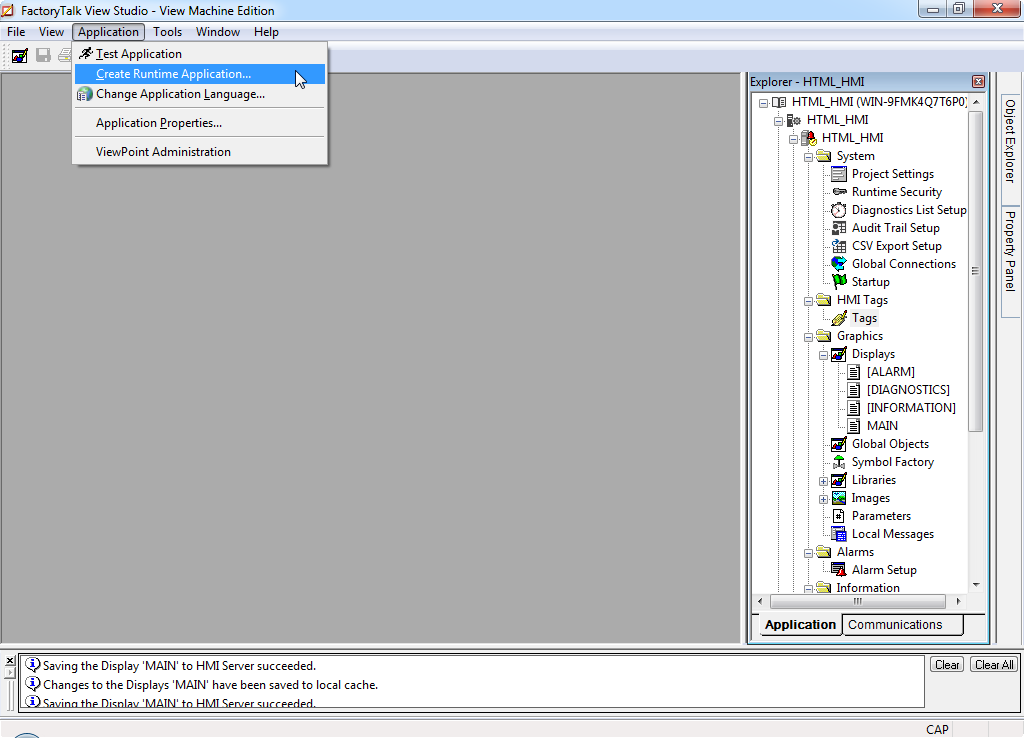
Next, we need to create our application. Click on Application > Create Runtime Application ...
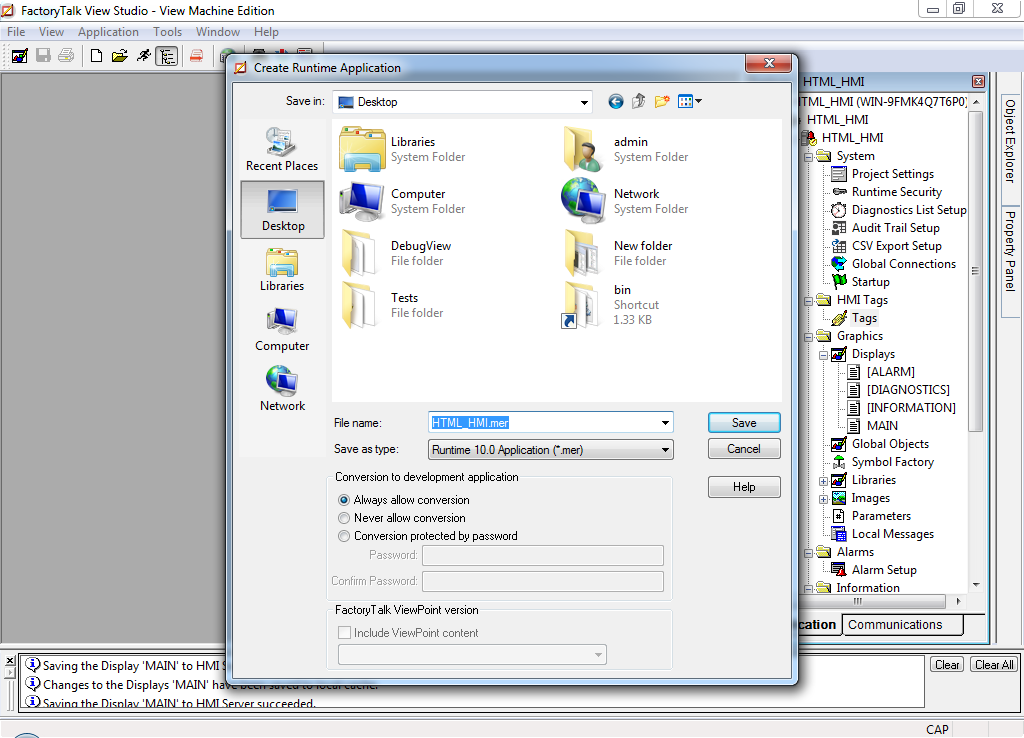
Select an output folder, eg. the Desktop. Click Save.
Wait for Factory Talk View Studio to compile ...
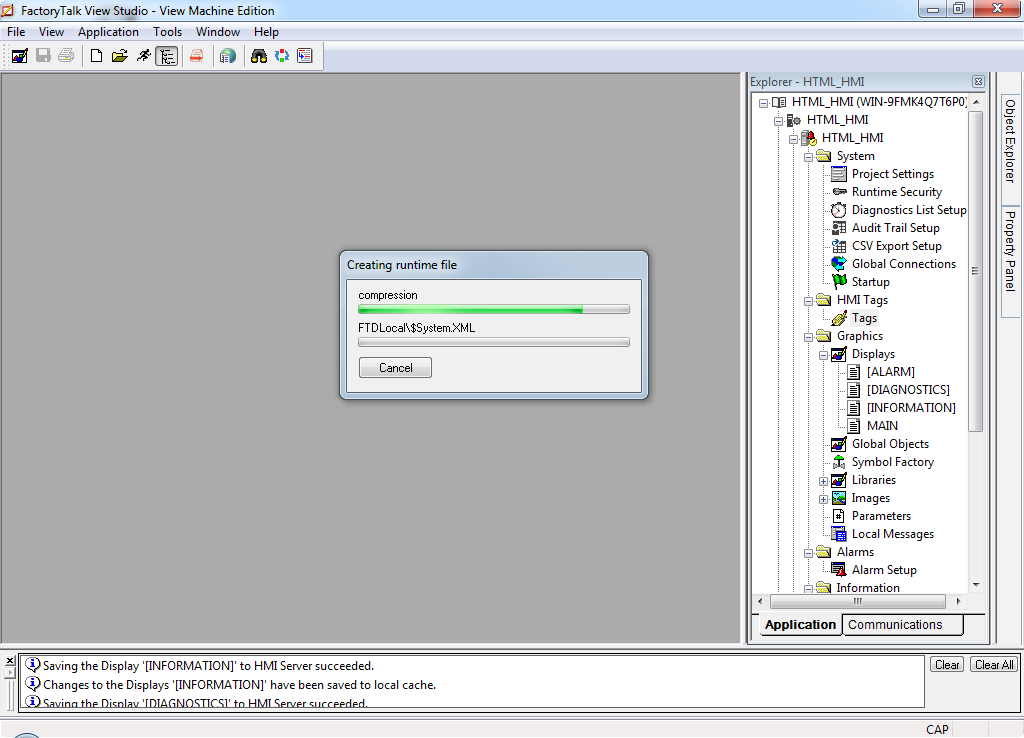
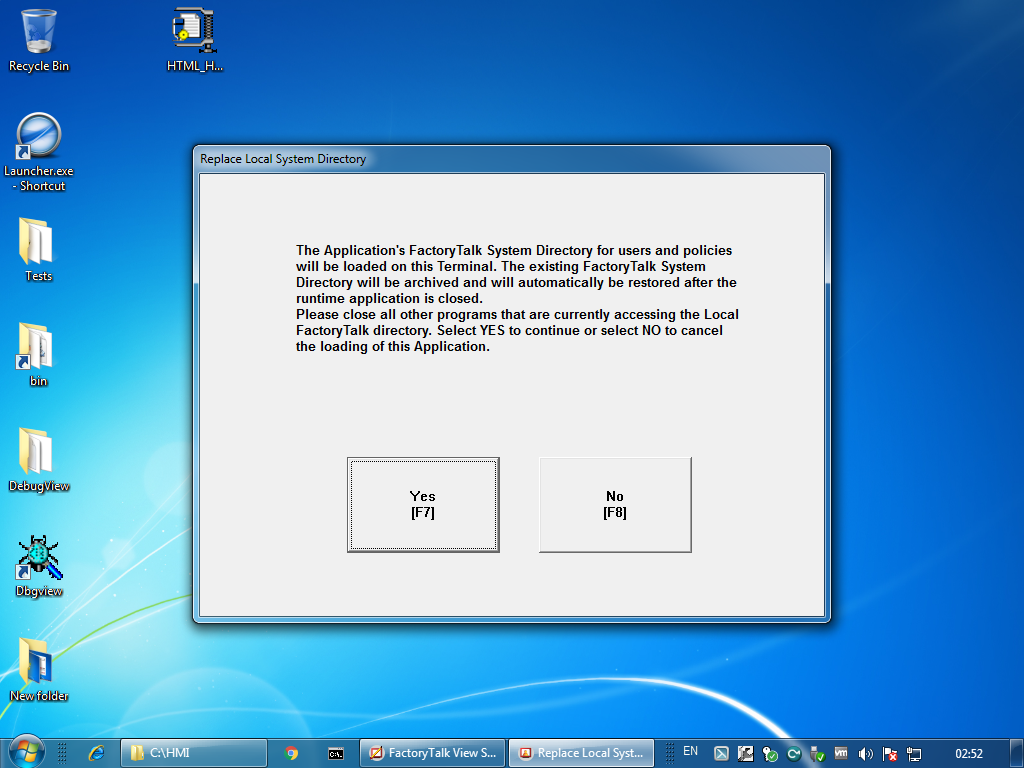
The HTML_HMI.mer file is now on your Desktop. Double-click to run it. Wait while FactoryTalk View Machine Edition is loading your application ...

Click Yes.
Click Run Application.
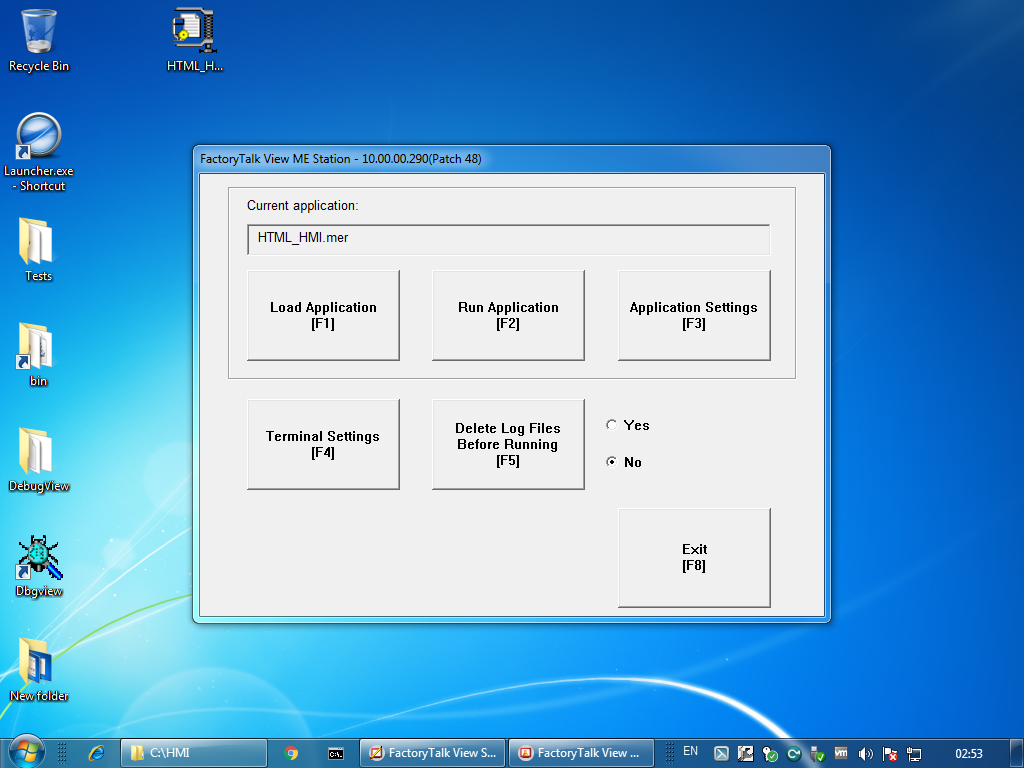
The HMI Display will load. To exit click Shutdown.