The following guide demonstrates how to add WebKitX control in a dBase 2019 Form.
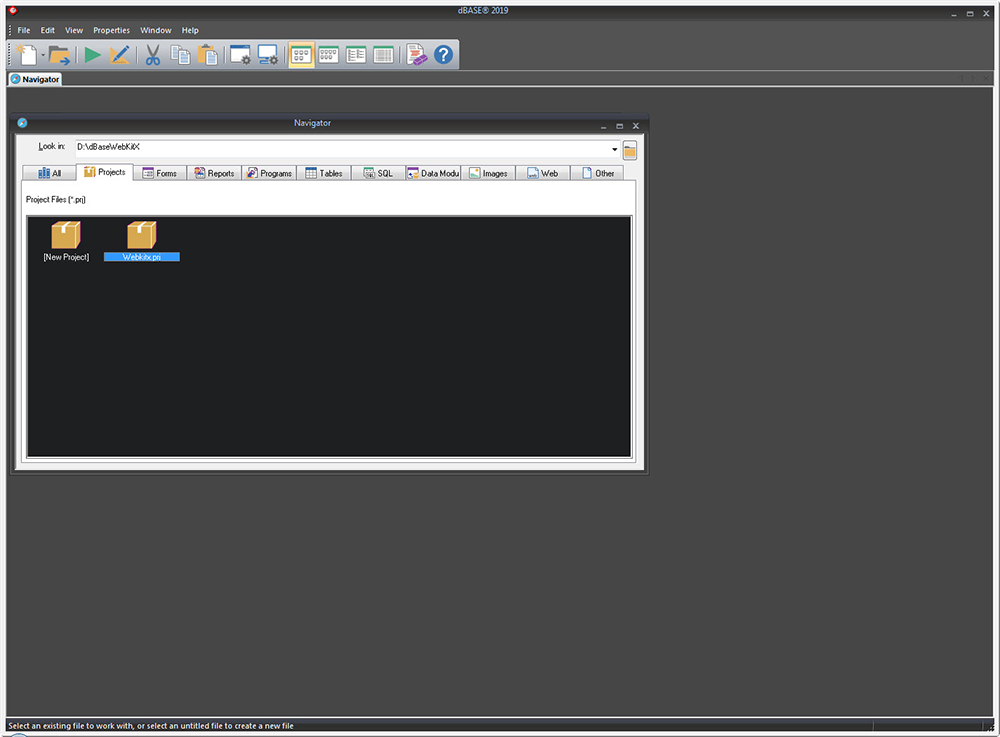
Create a new folder or a project for your application. The simplest way to do this is by using the Windows Explorer to create a new folder where your application's files will be saved. Open Windows Explorer and navigate to where you want to create the new Folder. Select File -> New -> Folder and create your project folder. Otherwise, start dBase and select File -> New Project... or double click the New Project icon from the Navigation window in dBase IDE.
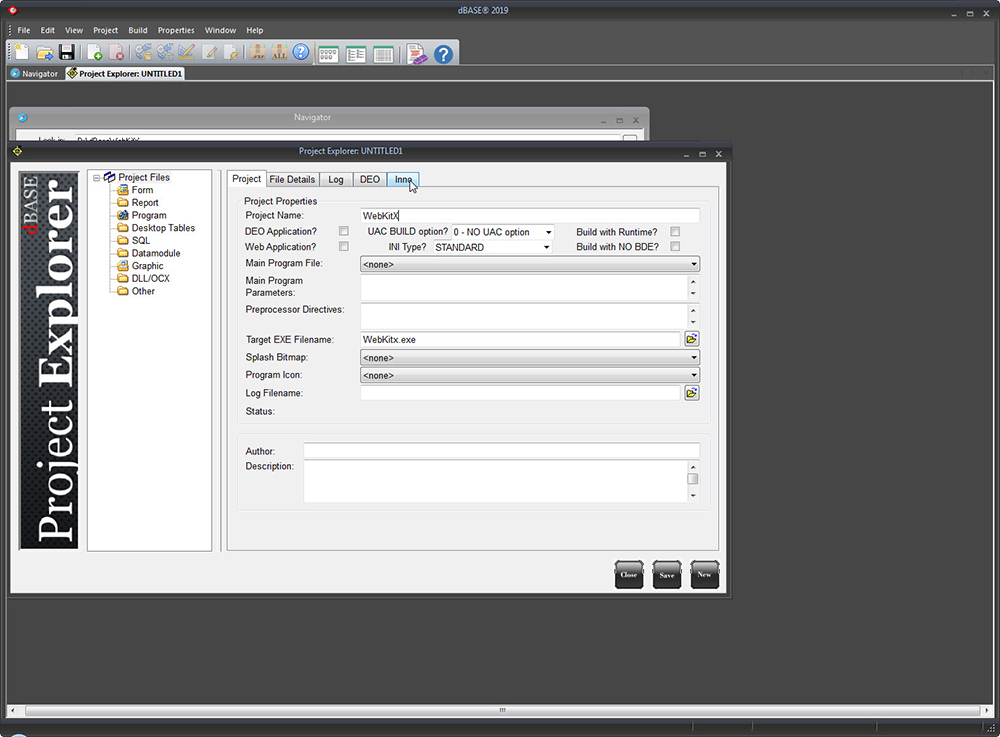
This will bring up the Project Expoler dialog. In the Project tab give a project name and click on the Inno tab.
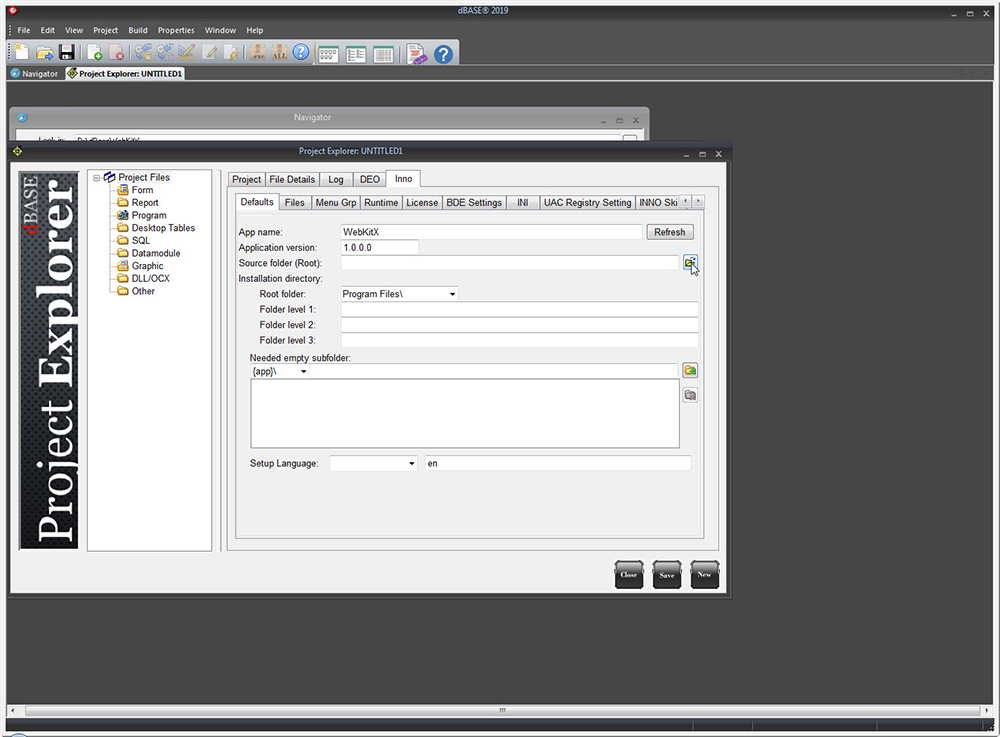
Click on the folder icon next to the Source Folder to specify the root location of the project.
Navigate to where you want to save your application and create a new folder.
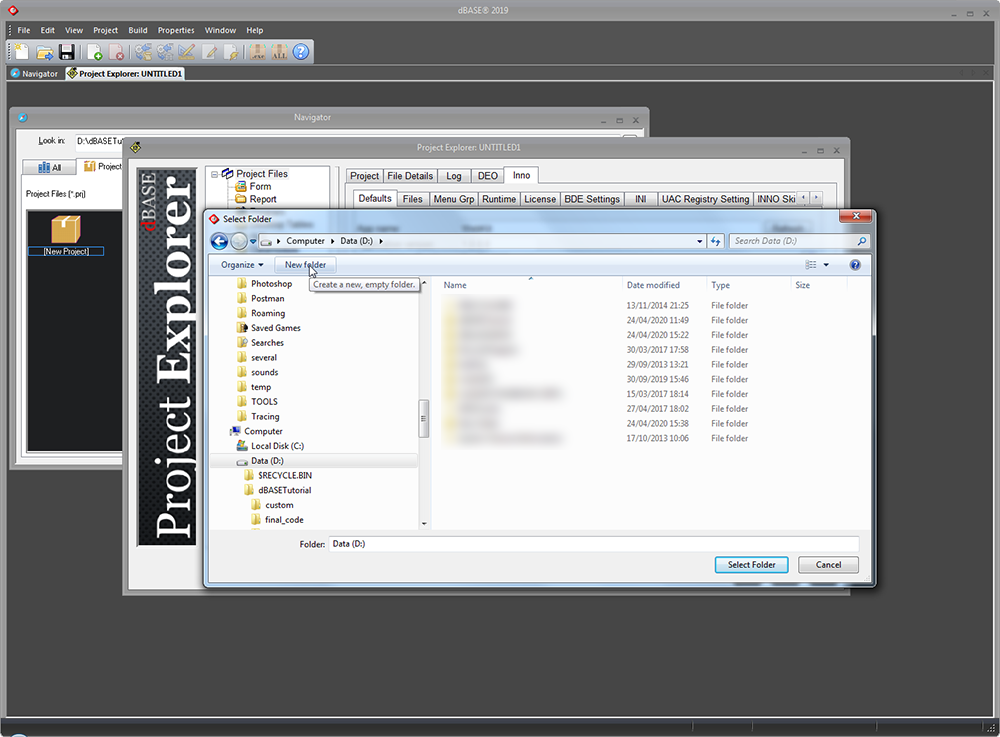
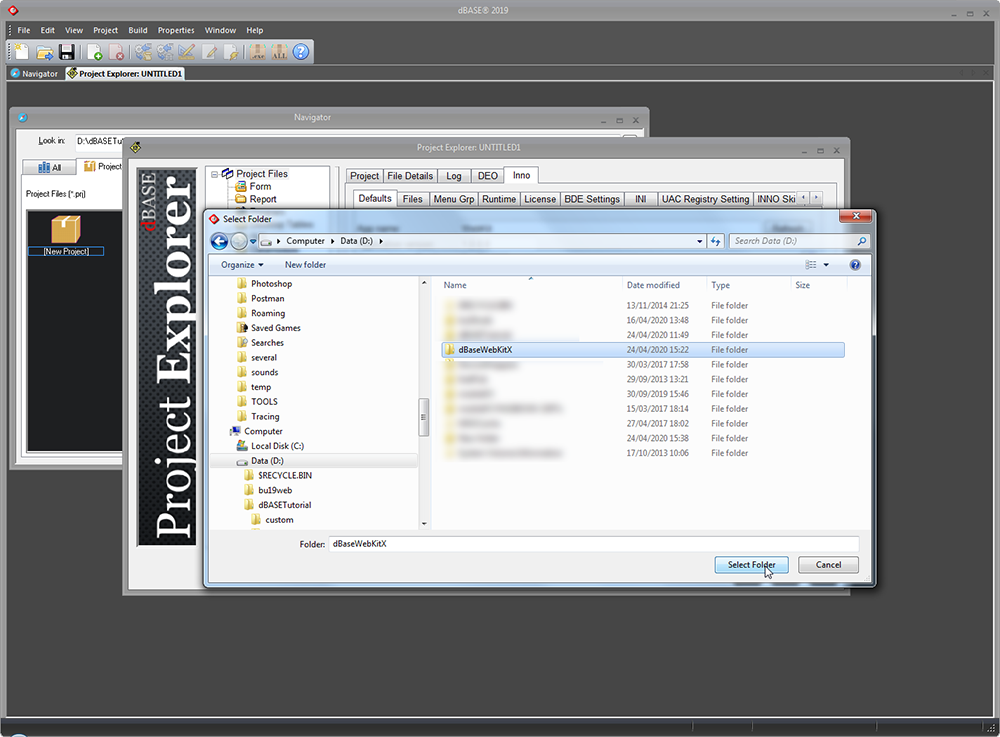
Rename the folder and click on Select Folder.
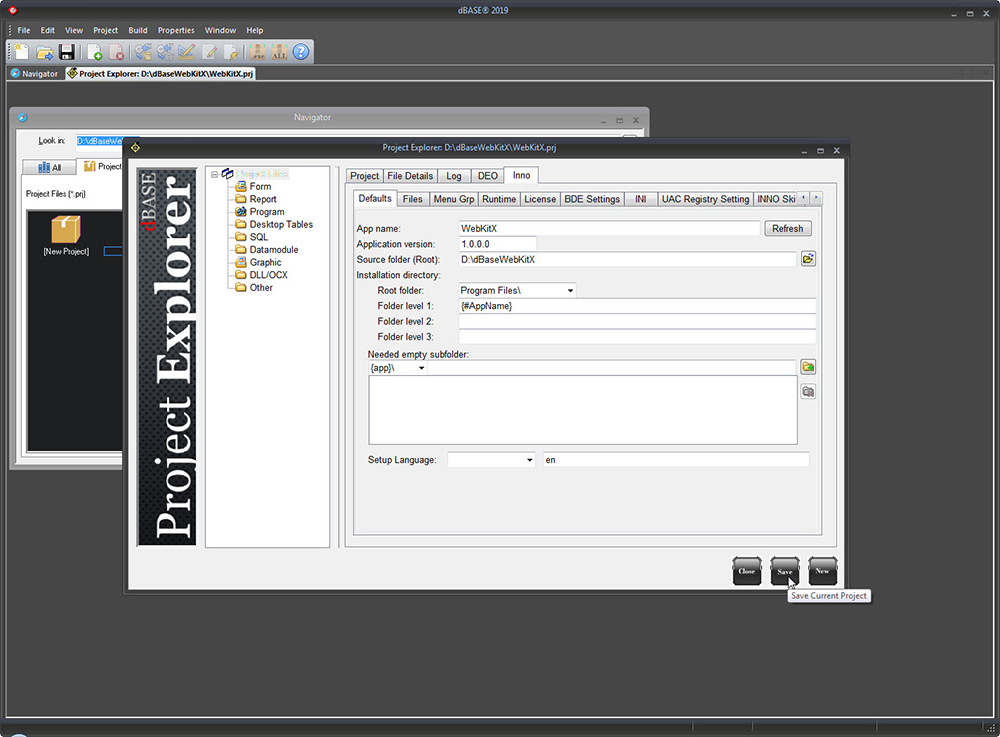
Click on the Save button to save your project (.prj) file.
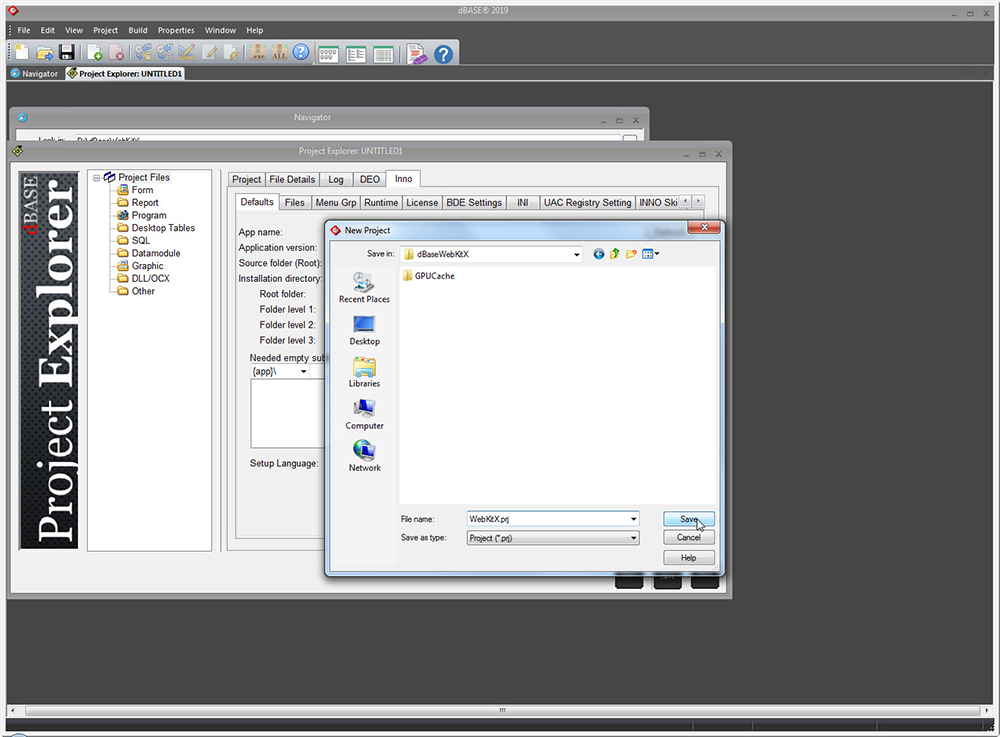
Give your project (.prj) file a name and click on the Save button.
Your project is ready and you can start adding files and building your application.
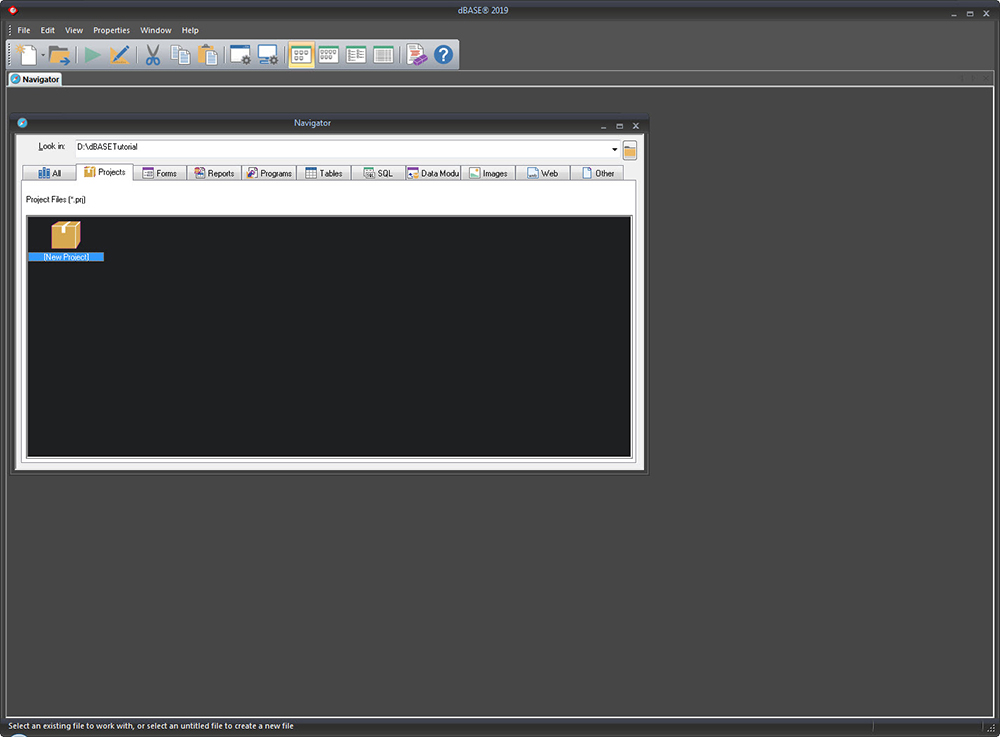
Make sure that you are currently working on your newly created project or navigate to your project folder if needed. From Navigator window click on the Look in drop down list and select your project folder. If it is not shown in the list, click on the folder icon and navigate to your project folder. Click on Select Folder.
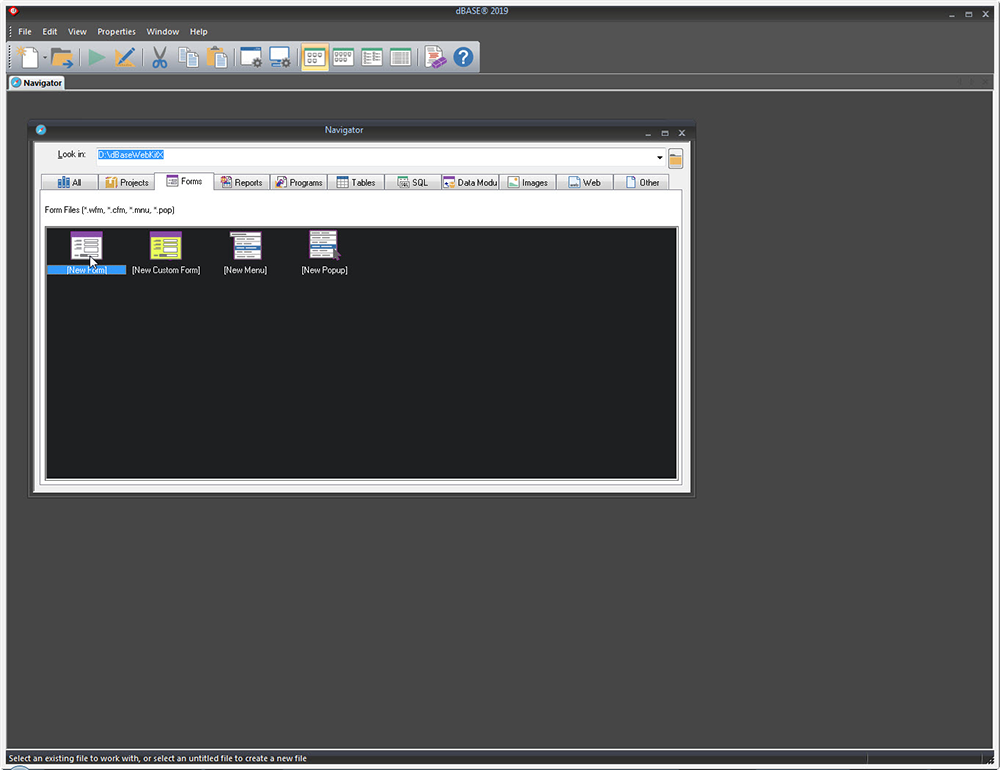
Create a new Form or open the form in which you want to add WebKitX in designer.
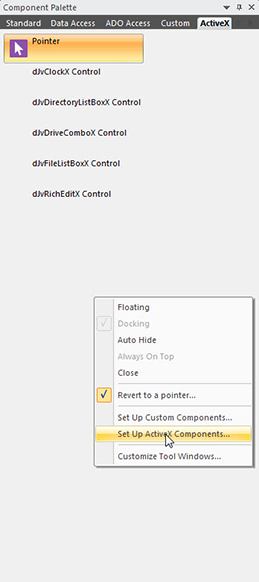
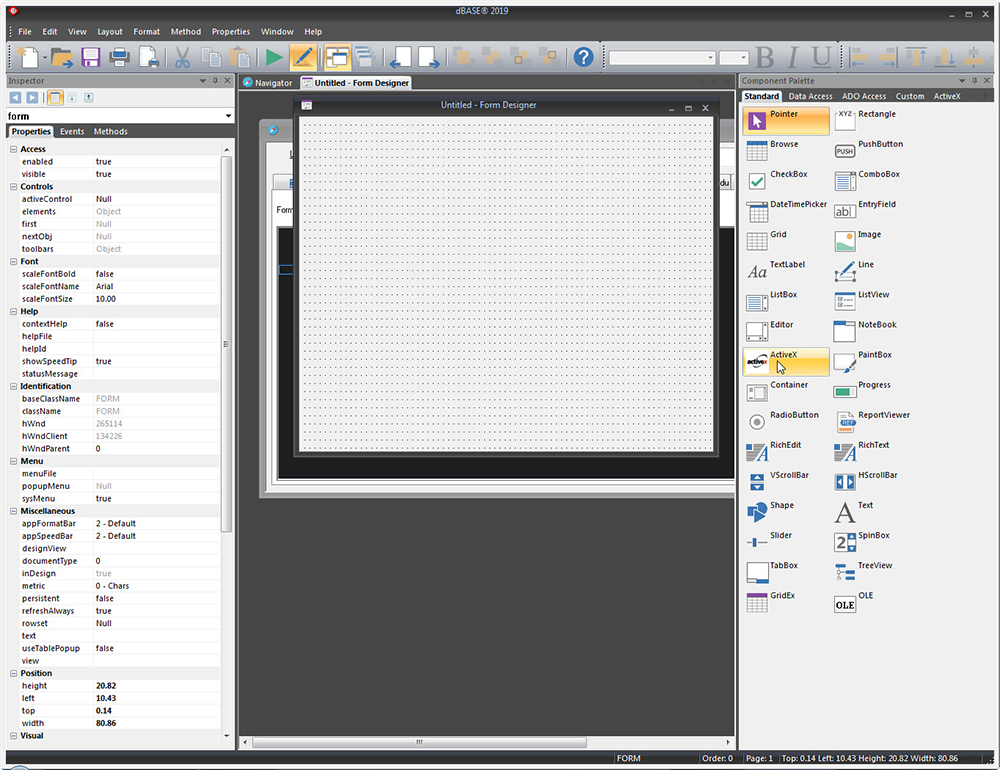
Right click inside the form to bring up the Component Palette.

Note that dBase provides two alternatives on how to add an ActiveX control in Component Palette. You can either add it using the ActiveX tab in Component Palette or by dragging an ActiveX component to your form and set the classID property from the Property Inspector.
Adding WebKitX control from the ActiveX tab in Component Palette (Alternative A)
Select the ActiveX tab in Component Palette. Right click on an empty space inside the tab and select “Set Up ActiveX Components…”
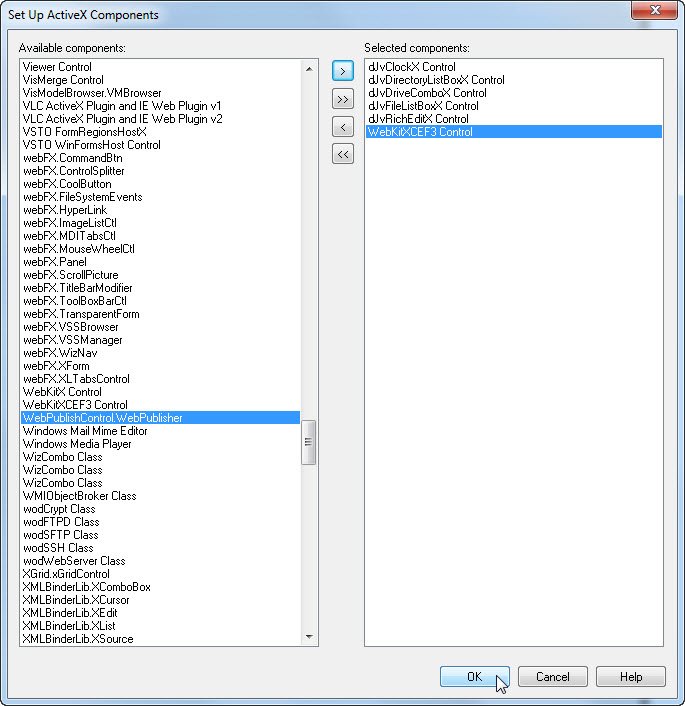
From the dialog, locate and click on the WebKitXCEF3 control and use the arrow to add it to the Selected components. Click OK. This will add the WebKitXCEF3 control to the palette. When you are done you can drag and drop it on your form to use it.
Adding WebKitX control using an ActiveX control (Alternative B)
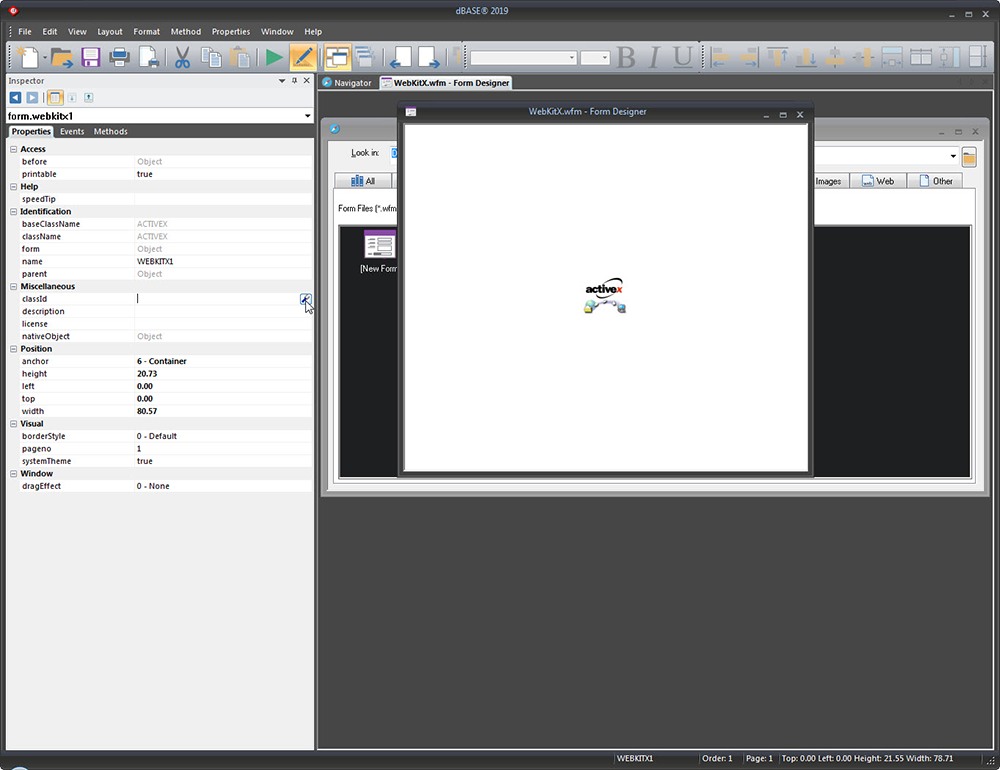
From the Standard tab in Component Palette, drag and drop an ActiveX control into the form designer.
Select the ActiveX control and, optionally, change its name to webkitx1 (or anything you want) in the Property Inspector. Drag the edges of WebKitXCEF3 Control until it has filled the grid.
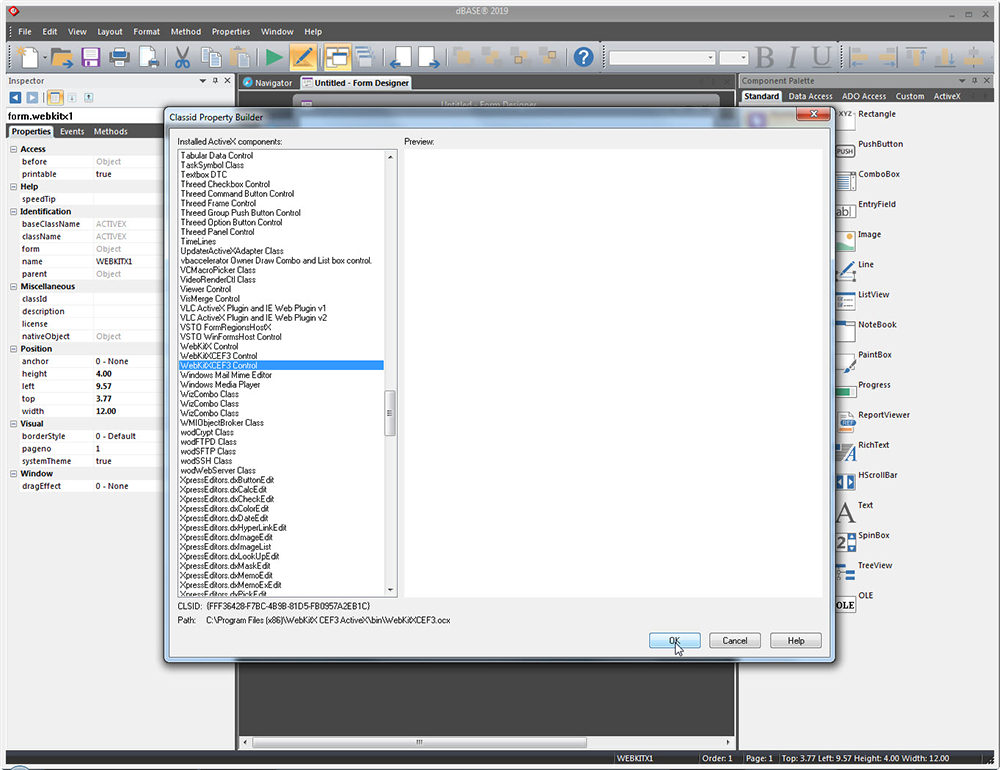
Next, find the classID property and click on the wrench button ![]() to the right of the classID property to open up the Classid Property Builder.
to the right of the classID property to open up the Classid Property Builder.
The Classid Property Builder dialog presents a list of all the available ActiveX controls on your computer. Locate and select WebKitXCEF3 control from the list and click OK.
After you have inserted the WebKitXCEF3 control into your project using either of the above alternative (Alternative A or B), you can continue with the control's setup described in the following paragraphs.
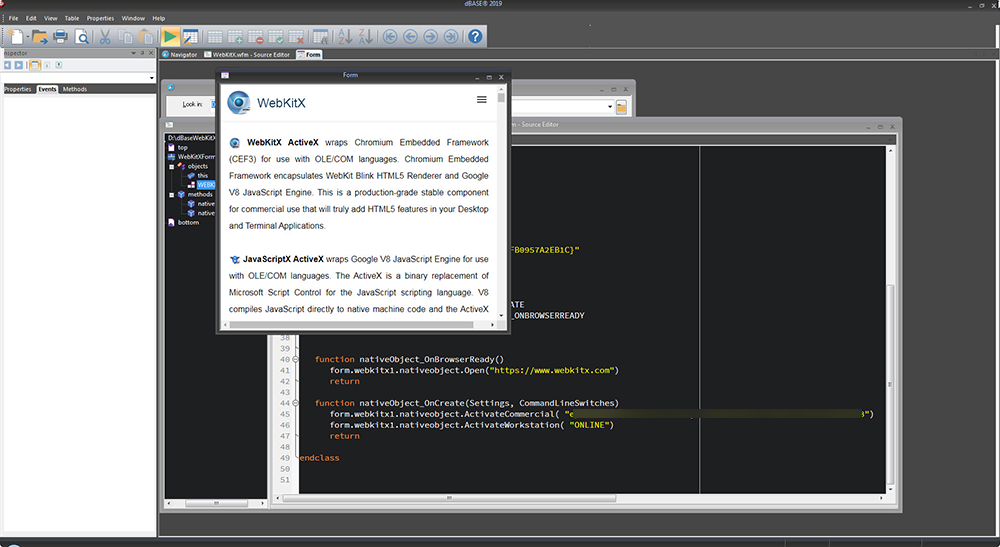
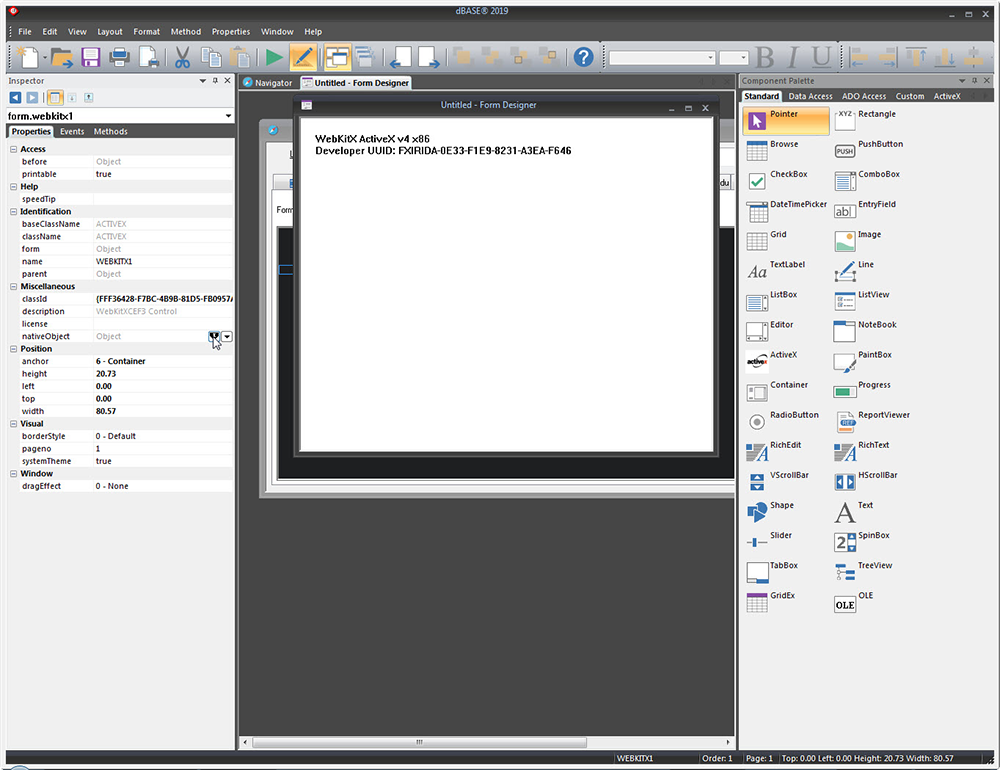
The Developer UUID of your Workstation will appear on the control's canvas . You will need this to activate your license.
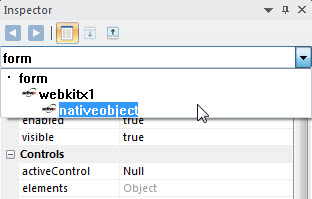
Click on the ![]() icon besides the nativeObject property or select it from the combobox of the Property Inspector to access the properties, methods and events of the control. Assuming that you have renamed the control to webkitx1, you should see this: form.webkitx1.nativeObject.
icon besides the nativeObject property or select it from the combobox of the Property Inspector to access the properties, methods and events of the control. Assuming that you have renamed the control to webkitx1, you should see this: form.webkitx1.nativeObject.
In the Properties tab, locate the DeveloperUUID and press on the wrench icon ![]() to open the Build String dialog. Copy-paste the text of the Developer UUID and send it by email to info@mobilefx.com for activating your license.
to open the Build String dialog. Copy-paste the text of the Developer UUID and send it by email to info@mobilefx.com for activating your license.
Next, click on the Events tab in Property Inspector and locate the OnCreate event.
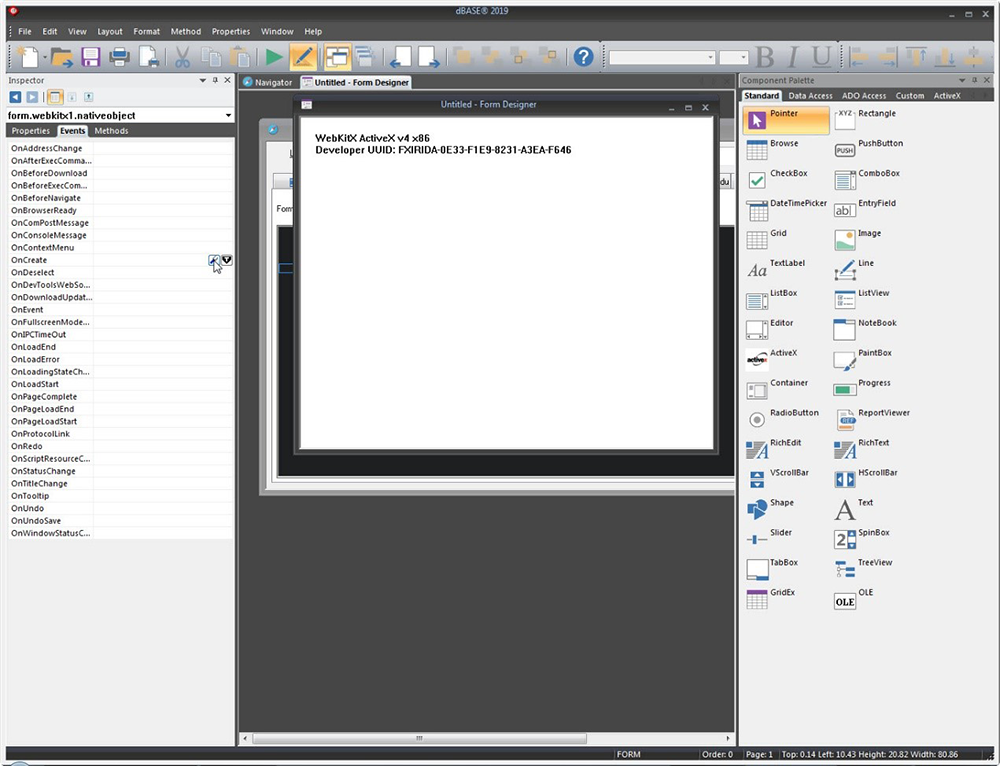
If you cannot find it, make sure the Property Inspector’s combobox shows the nativeObject of the WebKitX control.
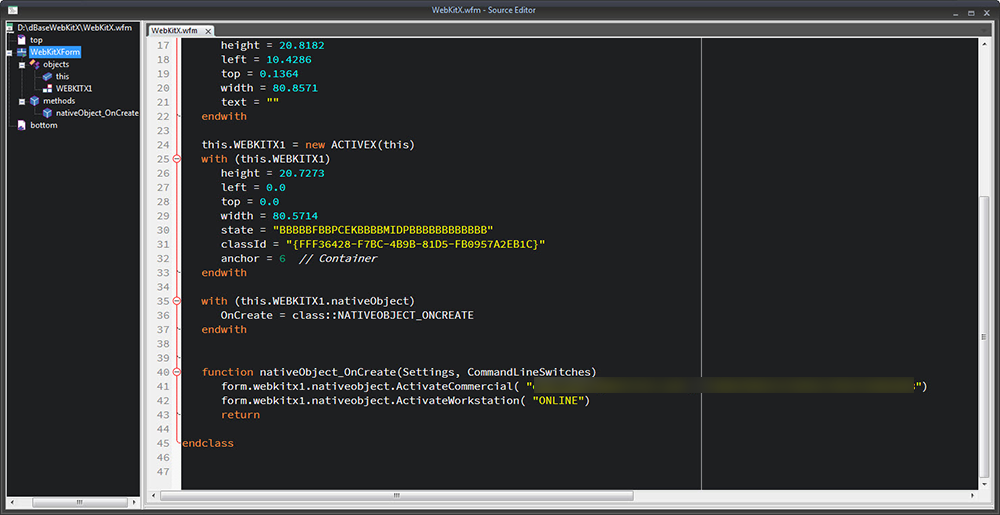
Enter your license info, as illustrated in the image below :
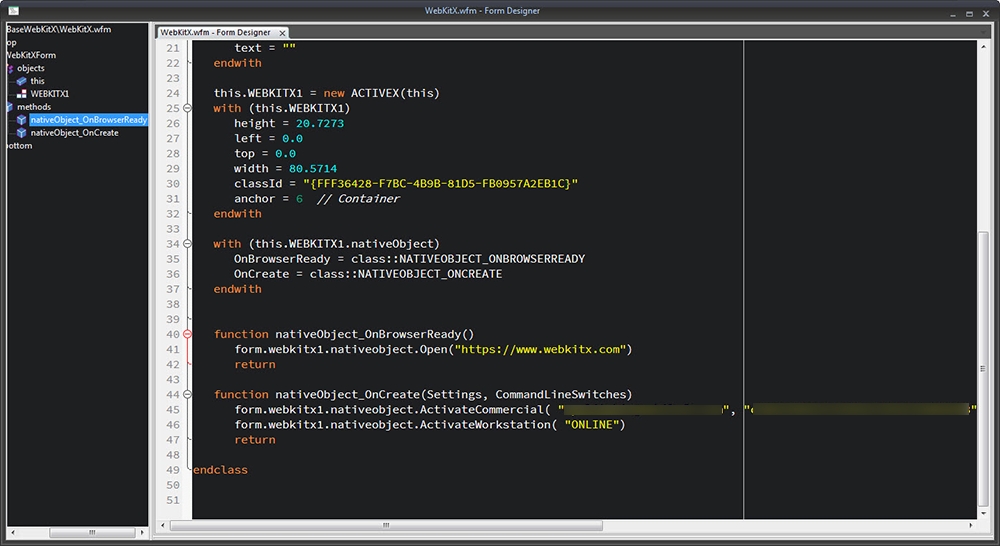
Then, locate the OnBrowserReady event from the Property Inspector and place the URL you want to navigate to, as shown below:
Save and Run Form and you should see WebKitX's landing page!